By Chad Szeklinski
All my life I wanted to drive a fire truck. The driver-operator of today is faced with changes and challenges because of many variables and outside parties. Why is this?
Sometimes these changes come from people in leadership roles who have never driven a fire truck before but are now experts on making policy on what a driver should or shouldn’t do. Why is that? As drivers, we should focus on one thing: our ability to become great drivers. Ask yourself why apparatus preparation is so necessary. Let’s discuss one way we can accomplish this.
The Walk-Around
Fire departments across the country have had their stories of a piece of equipment falling off a rig during a response to or from an alarm. Do a simple Internet search or ask someone in your own department. I know during my career I have heard a few stories. Who wants to be that person? Definitely not me! How can we stop this from happening? It’s simple: Drivers can start by preparing their rigs at the start of their shift, better known as a vehicle walk-around.
At the start of a shift, not only does the gear have to be ready to go but so do the apparatus and equipment. Let’s talk about the steps to prepare the apparatus. Make sure you have a starting point. For instance, I start mine in my driver’s seat. Why the driver’s seat? Well, the driver working on shift before me is six feet tall and has at least 75 pounds on me, a tall, athletic, five-foot eight-inch string bean. Kidding aside, adjusting the seat and mirrors is a great place to start. Next it’s important to start the apparatus to cycle the power takeoff in and out of pump gear along with checking gauges on the dash. Engaging the emergency warning lights along with dash gauges is very important since they can show early warning signs of a malfunction. Emergency lights not working need immediate attention. Be aware that some emergency lights don’t activate unless the parking brake is released.
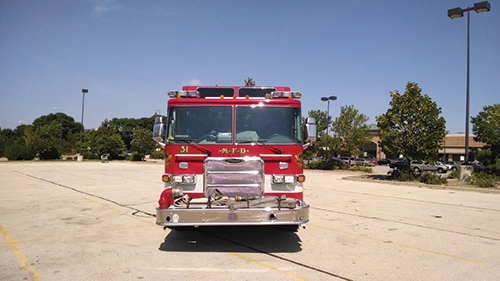 |
| If your rig has equipment mounted to the front bumper, is it all there, secured, and ready? Inspect the windshield wiper condition and emergency lights for correct operation. Also check headlights and marker lights for proper operation. (Photos by author.) |
When it comes to the dash gauges, we’re looking for proper voltage between 13 and 14 volts. Anything over that could mean the electrical system is being overcharged, which eventually will lead to electrical failure if not corrected. Next, check the fuel level. My department has a policy to keep fuel levels at ¾ full or more. Do you know yours? Look at the front and rear air brake gauges. Are they filling properly between 110 and 130 pounds per square inch and releasing? The list goes on and on, depending on your apparatus and added accessories. Take a look around the inside of the cab. Is the equipment secure, and are seat belts in good shape and easy to don? Could something become a projectile because of a sudden stop? Correct any issues before proceeding.
Outside Checks
Once the inside checks are complete, move outside. I like to start mine at the driver-side door, walking in a complete clockwise circle of the apparatus. Does it really matter which way to begin the outside walk-around? No. However, it’s always good to check with your department vehicle operations standard operating guidelines (SOGs). The key is to start at one spot and finish at that same spot. That way, you have completed a thorough inspection of the apparatus. Below is a list of things to consider while doing your walk-around.
Driver-side door: Make sure the mirror is secure and operational. Look for the door to open and close properly. Take a look at the condition of the paint and sheet metal. Is there any unreported damage? Does the window go up and down as designed? If your apparatus is equipped with a grab bar, is it secure and tight to the rig?
Front of the apparatus: Take a step back and peek under the rig to look for fluids leaking. A noticeable lean to one direction could indicate suspension issues. If your rig has equipment mounted to the front bumper, is it all there, secured, and ready? Inspect the windshield wiper condition and emergency lights for correct operation. Also on the front of the apparatus, let’s not forget the headlights and marker lights for proper operation.
 |
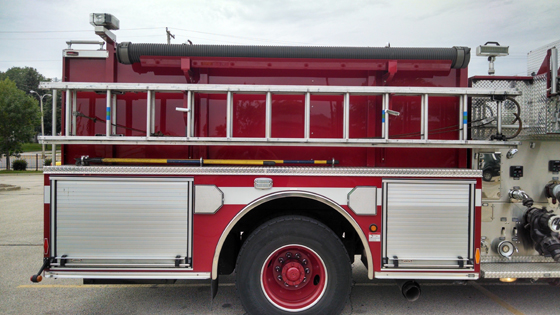
| Make sure ladders and pike poles are secured properly. If your department runs its rigs with ladders on the side, make sure the ladder halyard is positioned below the two rack points. This makes it easier for one person to pull the ladder off without getting the halyard caught. |
Officer-side door and crew cab door: Inspection of these doors is very similar to the driver-side door with one exception. In Milwaukee, our front suction hose runs on that side of the rig, meaning that we have a drain located under the officer and crew cab doors that remains open until a positive water supply is obtained. The rest of the doors are inspected just like the driver-side door: mirror, door operation, window, and grab bar.
Officer-side pump panel: I teach my new drivers to speak out loud and touch each gate and drain to prepare for a testing procedure. This helps them understand what they’re looking at along with creating muscle memory from it being hands-on. Make sure caps, gates, and drains along with any spanner wrenches are there and set the way you like for readiness or department SOGs.
Officer-side compartments, ladders, and pike poles: Check all compartments for correct operation, along with the equipment that should be in each. Make sure ladders and pike poles are secured properly. If your department runs its rigs like ours in Milwaukee, with ladders on the side, make sure your ladder halyard is positioned below the two rack points. This makes it easier for one person to pull the ladder off without getting the halyard caught.
Rear of the apparatus: Know your hose, how many sections should be there, and with what nozzles. Do you run a lead line or something similar? Is it all there and secured? How do you supply? In Milwaukee, we use a red strap on our high-pressure green four-inch supply line, which is charged as our first line off the rear, followed by a three-inch line with a yellow strap and a 2½-inch spray nozzle at the end as our second supply line.
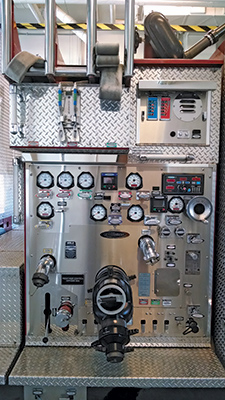 |
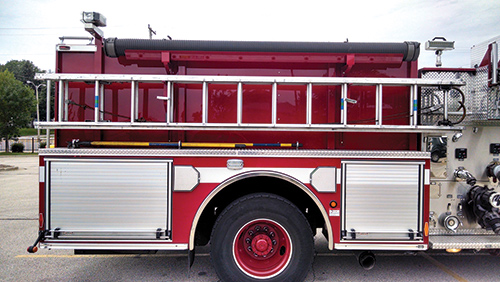
| At the pump panel, physically check each gate and drain to make sure they are operational. Leave intake drains open or closed according to your department’s protocol. Check tank and foam levels at the electric gauge for operation. |
Driver-side compartments including the driver/operator compartment: Again, is all the necessary equipment (wrenches and fittings) in its place and ready for use?
Pump panel: Make sure you recognize what you are looking at and how it works. Physically check each gate and drain to make sure it’s operational. Leave intake drains open or closed per your department’s protocol. Check tank and foam levels at the electric gauge for operation. Check for spanner wrenches.
Top of the rig: This is a great time to physically check actual tank and foam levels. Never rely solely on electric level indicators. Make sure the deck gun and night fighter light are below the height of the cab, hard suction hose is secured, and quick-attack lines including nozzles are ready to go.
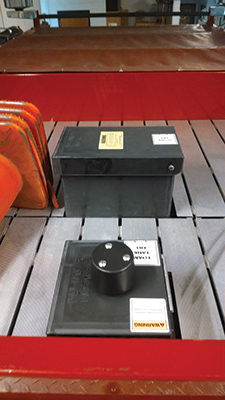 |
| The apparatus walk-around is also a great time to physically check actual tank and foam levels. Never rely solely on electric level indicators. |
Driver-side crew cab door: Inspect as if you were inspecting the driver, officer, and other crew cab doors. We’re looking at all the same components: mirrors, window operation, grab bar, body condition, and so on.
This brings us to where the walk-around began: the driver-side door. During a walk-around, don’t forget to inspect the tires for tread depth and overall condition with wheel chock location and operation. I know the walk-around seems like a lot. However, this important step cannot be overlooked. The key is to develop a system that works for you, the driver.
Endnotes
- Apparatus Procedures Guide Book, Milwaukee (WI) Fire Department.
- Driver Operator Hand Book, IFSTA, Second Edition.
- Motor Vehicle Instruction Guide Book, Milwaukee (WI) Fire Department.
CHAD SZEKLINSKI is a 20-year member of the Milwaukee (WI) Fire Department assigned to Tower 2 and a heavy equipment operator. He is certified as a fire instructor, company officer, hazmat tech, and EMT. Szelinkski is a fire department vehicle qualifier, and he has a certificate in automotive technology from Milwaukee Area Technical College.